OAuth2 Integration Guide
Overview
PSRESTful accepts OAuth2 bearer tokens for authenticated requests. This guide covers the client-credentials grant — the machine-to-machine (M2M) flow you use when your own backend (an ERP, storefront sync job, or middleware) calls the API on behalf of your account.
You create a Developer App in the dashboard, receive a client_id and client_secret,
exchange them for a short-lived access token, and send that token as a Bearer header.
TL;DR for engineers
- Dashboard → Account Settings → Developer Apps → Create App → copy
client_id/client_secret.POST https://auth.psrestful.com/oauth/tokenwithgrant_type=client_credentials,audience=psrestful.- Send
Authorization: Bearer <access_token>tohttps://api.psrestful.com/....- Cache the token until it nears
expires_in(24h). Don’t mint one per request.
When to use OAuth2 vs. an API key
| Use case | Works with | Recommended |
|---|---|---|
| Browser / storefront reads | Public API key (origin-locked) | Public API key — never a client secret in a browser |
| Server-side reads (catalog, inventory, pricing, media, status, invoices) | Private API key · OAuth2 | Either |
| Submitting purchase orders | Private API key · OAuth2 | OAuth2 |
Account / admin endpoints (/me, /credentials/*, /subaccounts/*) | Private API key · OAuth2 | OAuth2 |
OAuth2 is recommended, not required, for purchase orders and account operations — a private API key works there too. We recommend OAuth2 because tokens are short-lived, rotatable, and scoped to a single app, so you avoid embedding a long-lived static secret in your ERP. The one hard rule: the public (browser) API key cannot submit POs or call account/admin endpoints — use a private key or OAuth2 for those.
A client secret is a confidential credential. Never ship it to a browser or mobile bundle; for in-browser calls use the public API key flow described in Authentication.
1. Prerequisites
- A PSRESTful account.
- A user with the Admin or Developer role on that account (only these roles can manage Developer Apps). See Roles & Permissions.
2. Create a Developer App
- Open the dashboard and go to Account Settings → Developer Apps.
- Click Create App.
- Give it a Name (e.g.
erp-sync) and an optional description, then Create. - A Client Secret is shown once — copy it now and store it somewhere safe (a secrets manager, not source control).
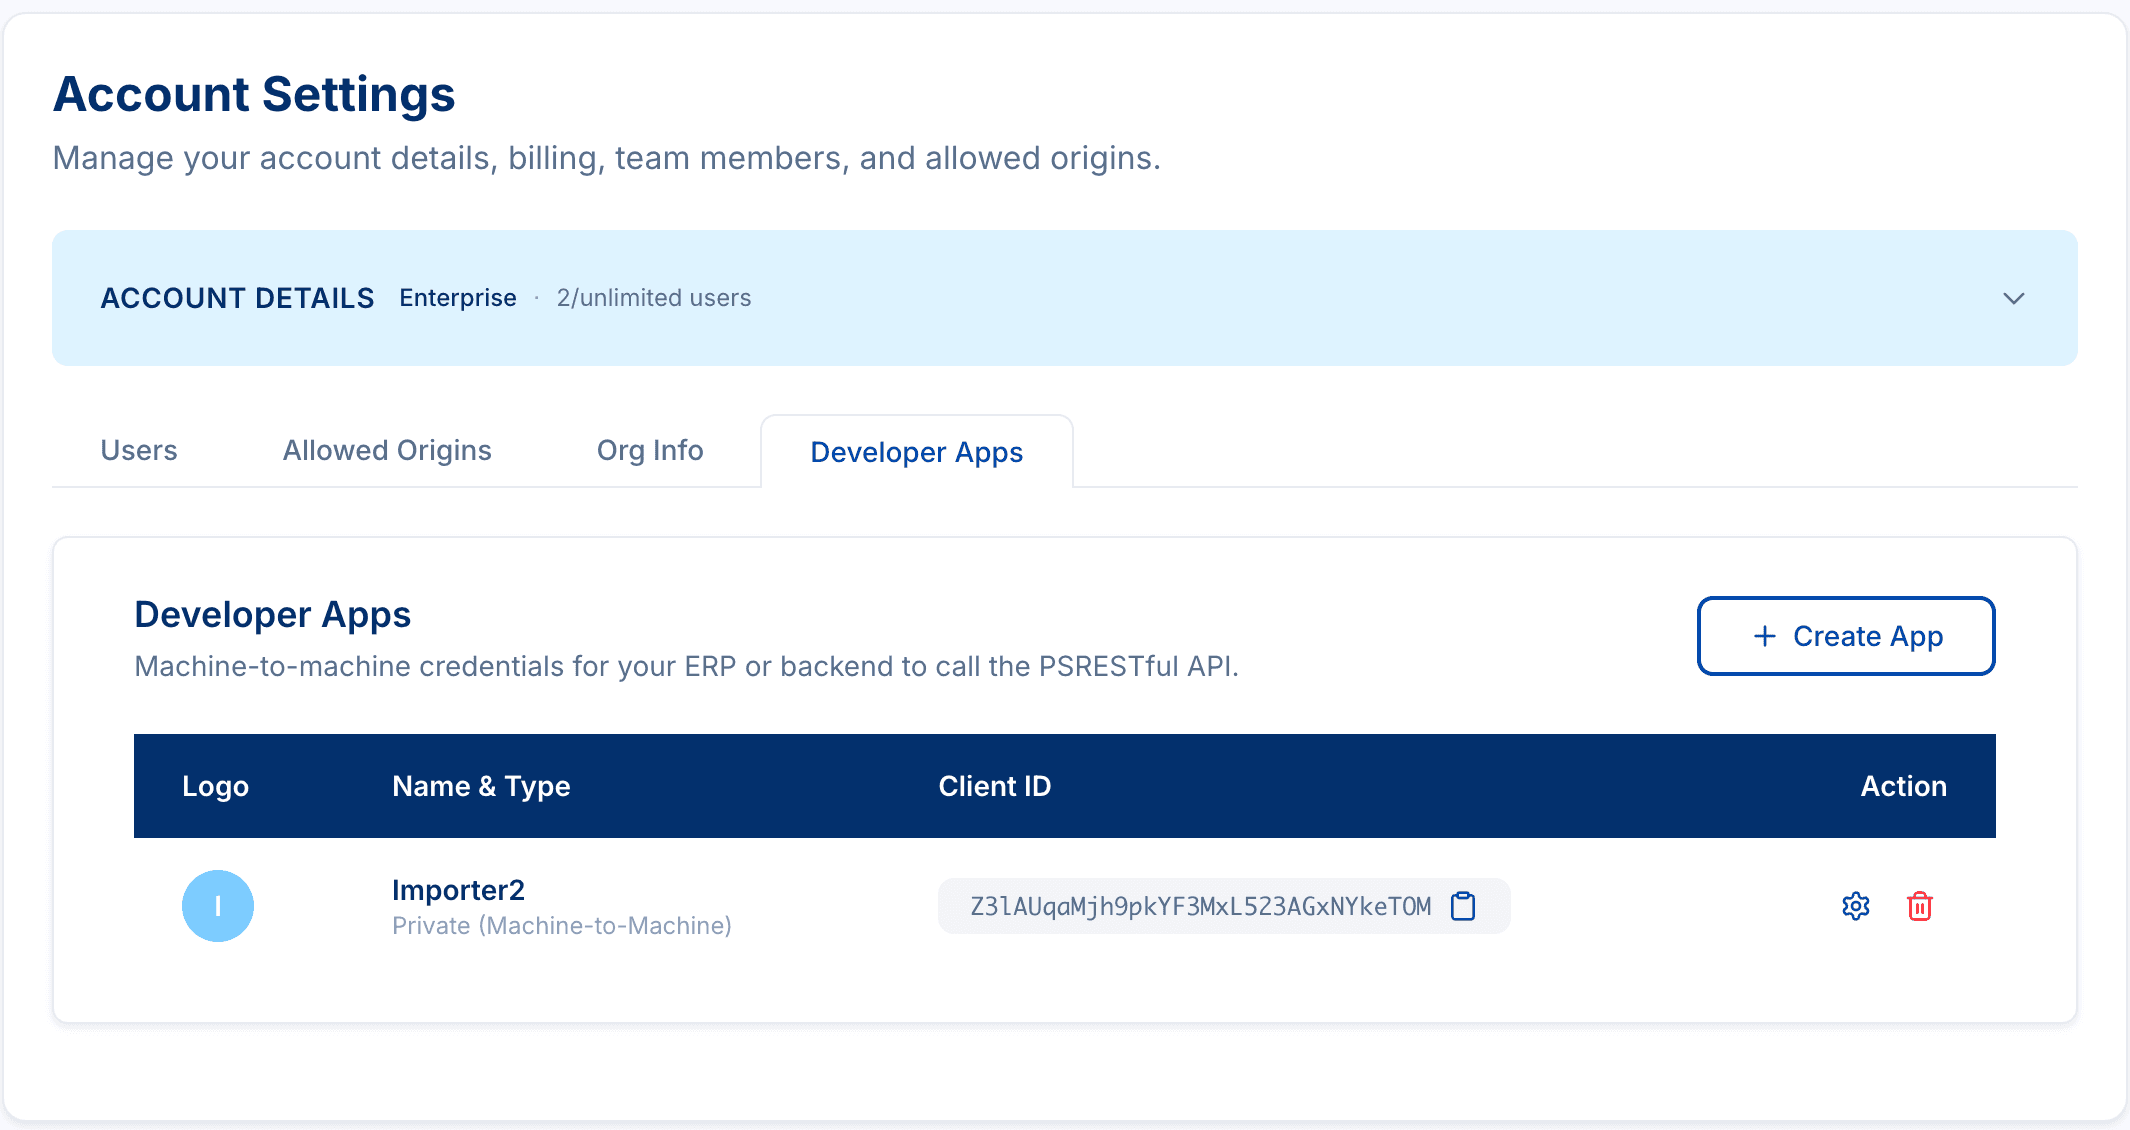
Your app now appears in the list with its Client ID. Open the app’s Settings tab (the gear icon) at any time to copy the Client ID, reveal the secret again (admins only), or rotate it.
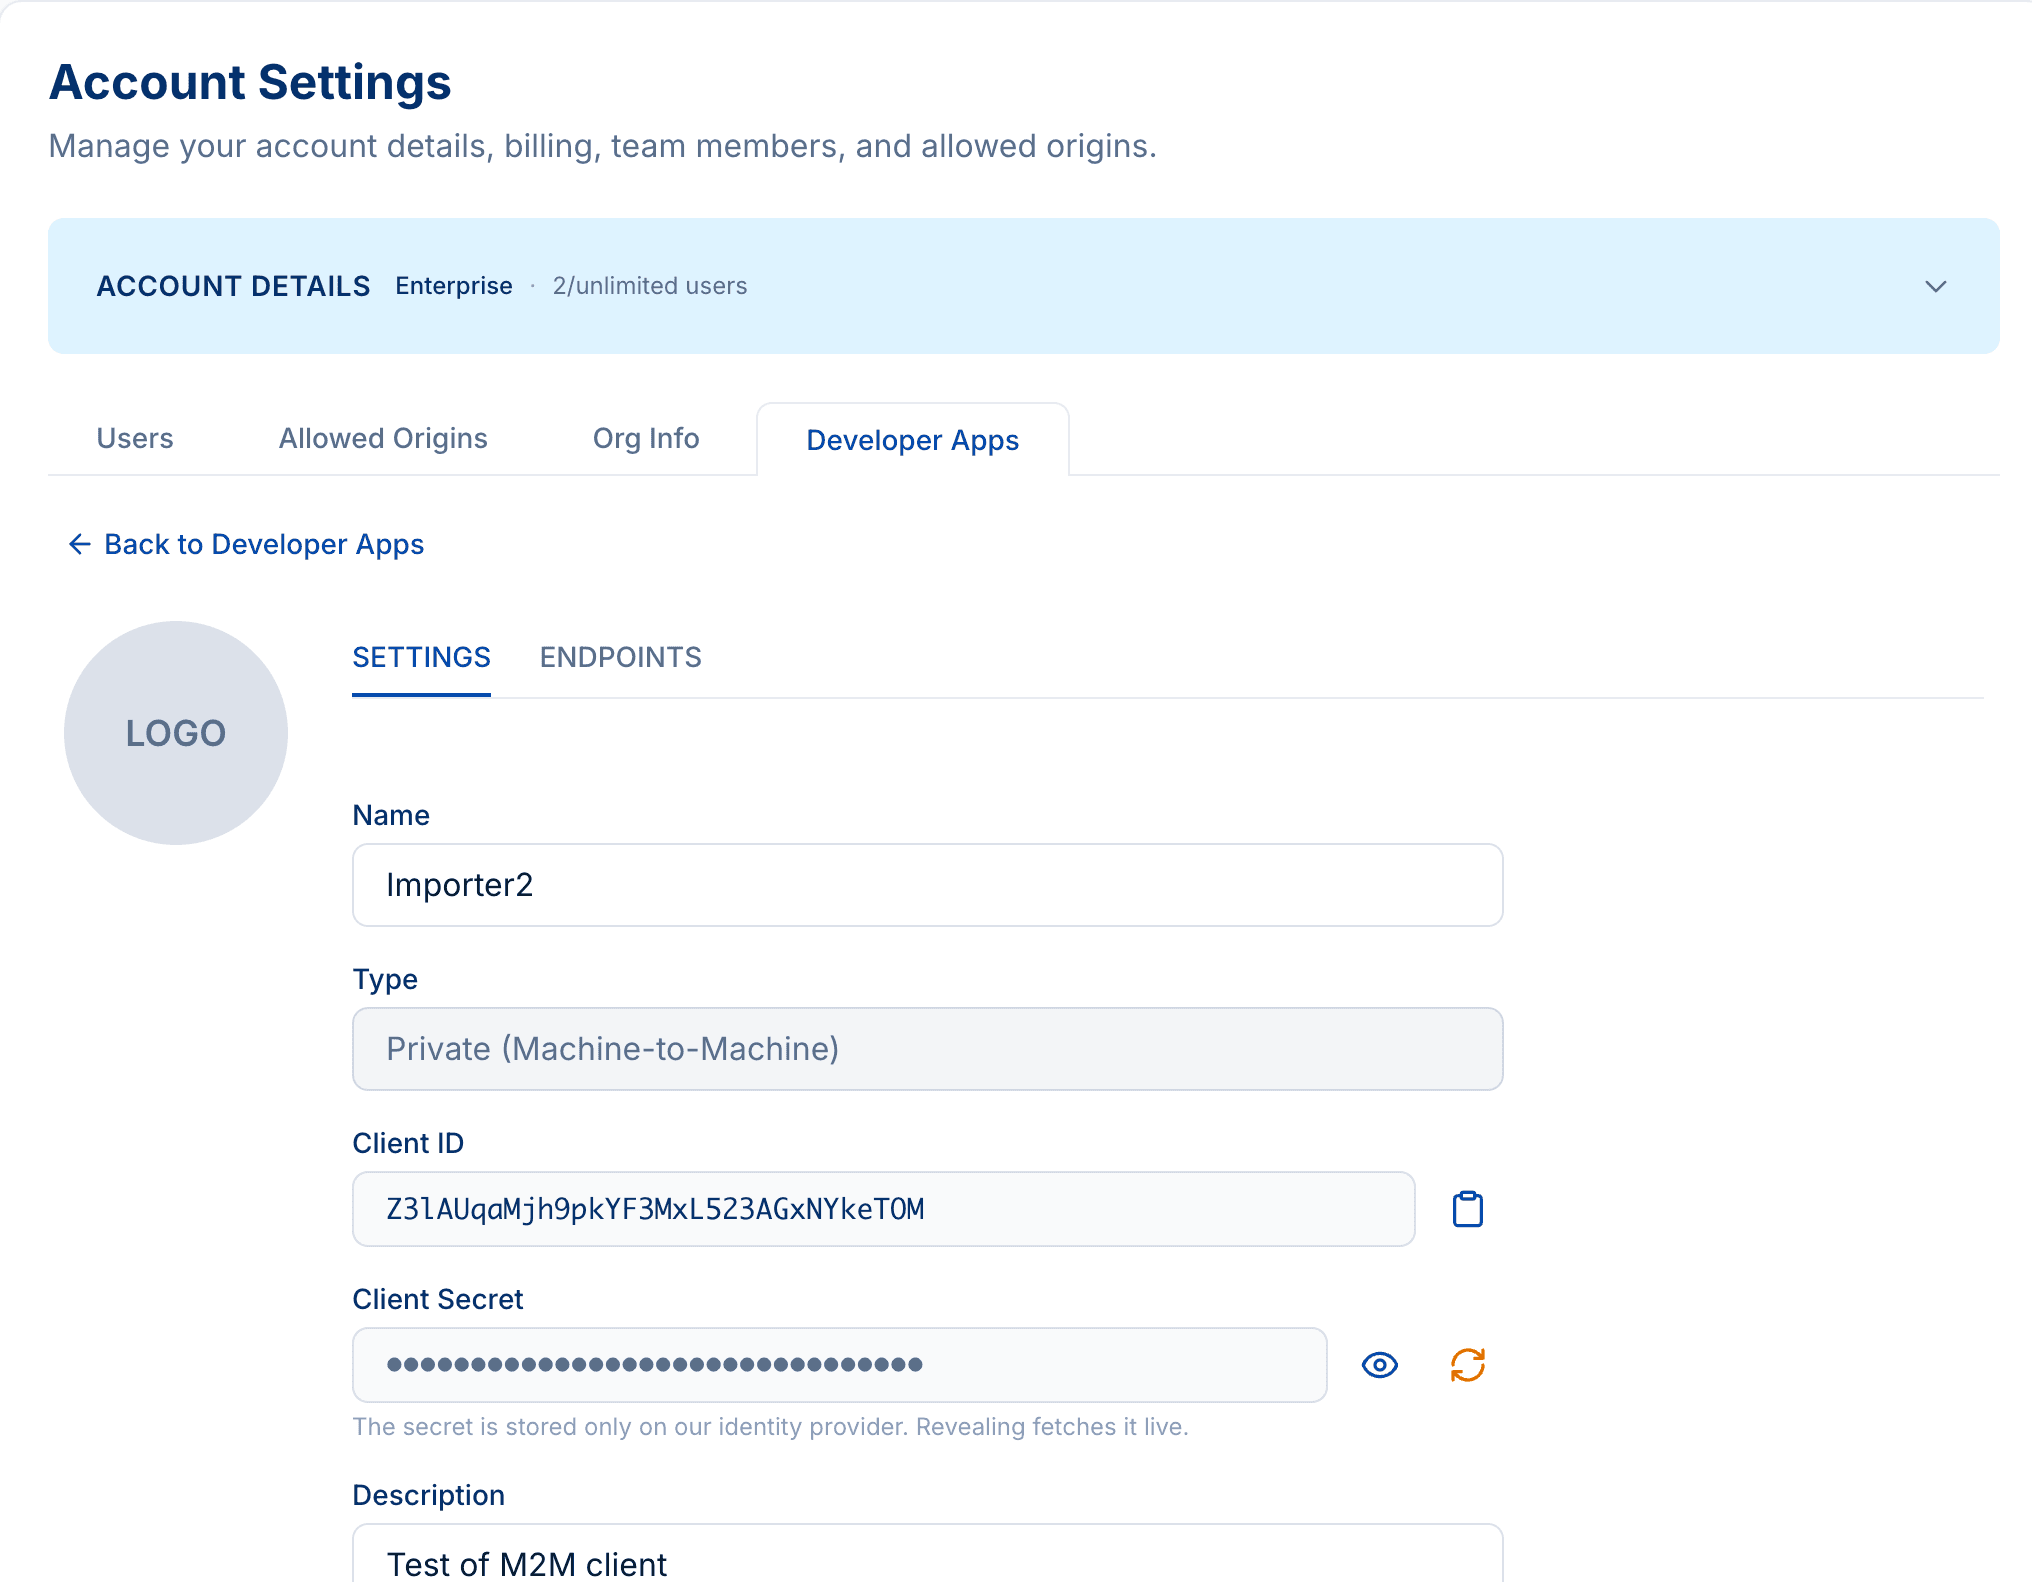
| Field | Where it’s used |
|---|---|
| Client ID | Public identifier of the app. Safe to log. |
| Client Secret | Confidential. Used only server-side to obtain tokens. Rotatable; revealable by admins. |
| Token URL | https://auth.psrestful.com/oauth/token |
| Audience | psrestful |
Each Developer App is bound to one account. A token minted from the app authorizes as that account — the same account whose supplier credentials and plan limits apply.
3. Request an access token
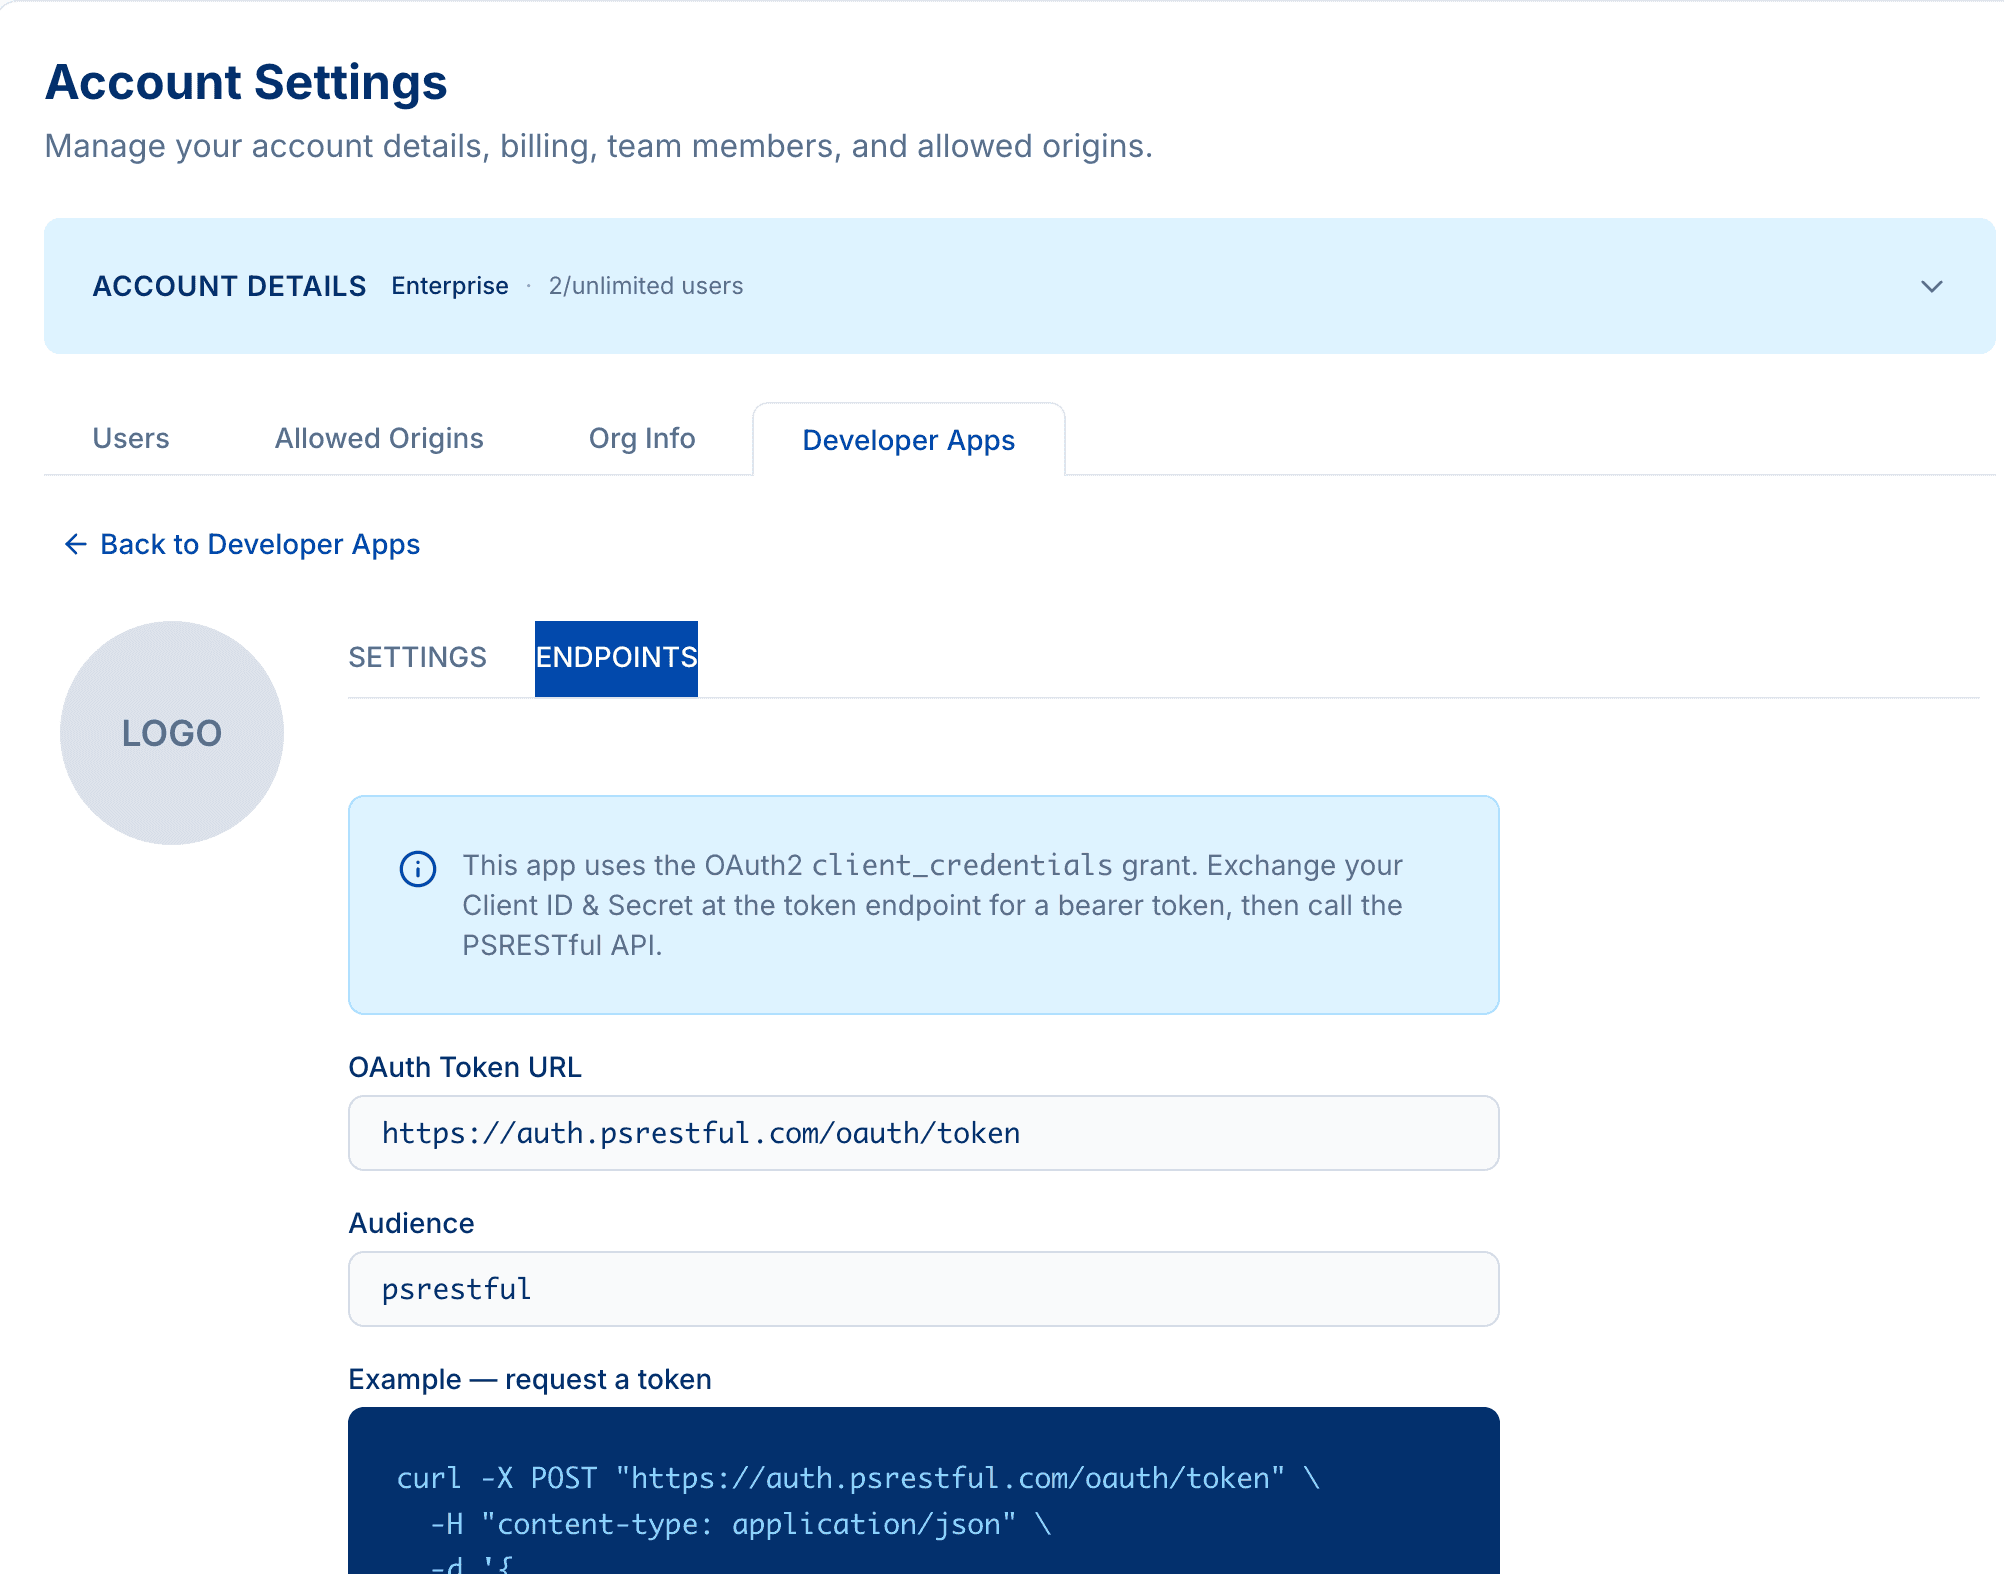
Exchange your credentials for a token using the client_credentials grant. The app’s Endpoints
tab shows your exact token URL, audience, and a copy-paste example:
curl -X POST "https://auth.psrestful.com/oauth/token" \
  -H "content-type: application/json" \
  -d '{
    "client_id":     "YOUR_CLIENT_ID",
    "client_secret": "YOUR_CLIENT_SECRET",
    "audience":      "psrestful",
    "grant_type":    "client_credentials"
  }'
Response:
{
  "access_token": "eyJhbGciOiJSUzI1NiIsInR5cCI6IkpXVC...",
  "expires_in": 86400,
  "token_type": "Bearer"
}expires_inis in seconds (86400 = 24 hours).- The token is a signed JWT. You don’t need to parse it — just send it as a bearer token.
4. Call the API
Send the token in the Authorization header.
Smoke test — confirm your token resolves to the right account:
curl "https://api.psrestful.com/me" \
  -H "Authorization: Bearer YOUR_ACCESS_TOKEN"
A normal read, using the same token:
curl "https://api.psrestful.com/v1.1.0/suppliers/PCNA/inventory-levels/..." \
  -H "Authorization: Bearer YOUR_ACCESS_TOKEN"
If /me returns your account, your OAuth2 setup is correct — any remaining 403s are about
supplier credentialing, not your token. See Troubleshooting.
5. Cache the token — don’t mint one per request
Tokens are valid for 24 hours. Fetch once, reuse until it’s close to expiry, then fetch a new one. Minting a token on every API call is slow and unnecessary.
Python
import time
import requests

TOKEN_URL = "https://auth.psrestful.com/oauth/token"
API_BASE = "https://api.psrestful.com"
CLIENT_ID = "YOUR_CLIENT_ID"
CLIENT_SECRET = "YOUR_CLIENT_SECRET"

_token = {"value": None, "exp": 0}

def get_token() -> str:
    # Refresh 60s before expiry to avoid edge-of-expiry failures.
    if _token["value"] and time.time() < _token["exp"] - 60:
        return _token["value"]
    resp = requests.post(TOKEN_URL, json={
        "client_id": CLIENT_ID,
        "client_secret": CLIENT_SECRET,
        "audience": "psrestful",
        "grant_type": "client_credentials",
    }, timeout=15)
    resp.raise_for_status()
    data = resp.json()
    _token["value"] = data["access_token"]
    _token["exp"] = time.time() + data["expires_in"]
    return _token["value"]

def get_inventory(supplier: str, product_id: str):
    r = requests.get(
        f"{API_BASE}/v1.1.0/suppliers/{supplier}/inventory-levels/{product_id}/",
        headers={"Authorization": f"Bearer {get_token()}"},
        params={"environment": "PROD"},
        timeout=30,
    )
    r.raise_for_status()
    return r.json()
Node.js
let cached = { value: null, exp: 0 };

async function getToken() {
  if (cached.value && Date.now() / 1000 < cached.exp - 60) return cached.value;
  const res = await fetch("https://auth.psrestful.com/oauth/token", {
    method: "POST",
    headers: { "content-type": "application/json" },
    body: JSON.stringify({
      client_id: process.env.PSRESTFUL_CLIENT_ID,
      client_secret: process.env.PSRESTFUL_CLIENT_SECRET,
      audience: "psrestful",
      grant_type: "client_credentials",
    }),
  });
  if (!res.ok) throw new Error(`token request failed: ${res.status}`);
  const data = await res.json();
  cached = { value: data.access_token, exp: Date.now() / 1000 + data.expires_in };
  return cached.value;
}
6. Security best practices
- Keep the secret server-side. Never embed it in a browser, mobile app, or public repo. For browser reads use the public API key flow.
- One app per integration. Create a separate Developer App per system (ERP, storefront, staging). You can then rotate or delete one without affecting the others.
- Rotate on suspicion. Use Rotate on the app’s Settings tab if a secret may have leaked — the old secret stops working immediately.
- Store tokens in memory. Treat access tokens like passwords; don’t log them or write them to disk.
- Always use HTTPS.
7. Troubleshooting
| Symptom | Likely cause | Fix |
|---|---|---|
401 Unauthorized | Token expired, missing, malformed, or audience ≠ psrestful when requested | Re-mint the token; confirm the Authorization: Bearer header and audience=psrestful. |
403 Forbidden | Token is valid but the account has no credentials for that supplier, or the supplier rejected the upstream call | Add the supplier in the dashboard; verify your supplier account is active. /me should still succeed. |
403 on a PO or account endpoint with the public API key | The public (browser) key can’t do writes or account operations | Use a private API key or an OAuth2 token. |
429 Too Many Requests | You exceeded your plan’s per-day quota | See Rate Limits; upgrade or spread out calls. |
The /me endpoint is the fastest way to isolate a problem: if it returns your account, your token
is good and the issue is downstream (supplier credentialing or rate limits).
Related
- Authentication — all auth methods (API key, public key, bearer token)
- Roles & Permissions — who can manage Developer Apps
- Rate Limits — per-plan quotas and
429handling - Credentials API — managing your supplier credentials
- API Reference — full endpoint catalog